Building & Training a Risk Model
Risk Model Overview
A risk model is a type of machine learning model that predicts a “risk” score for a given outcome. Outcomes can be of type occurrence or regression.
Creating a Risk Model
- Navigate to the folder where you want your model to be stored
- Click the “+” icon located to the right of “Models”
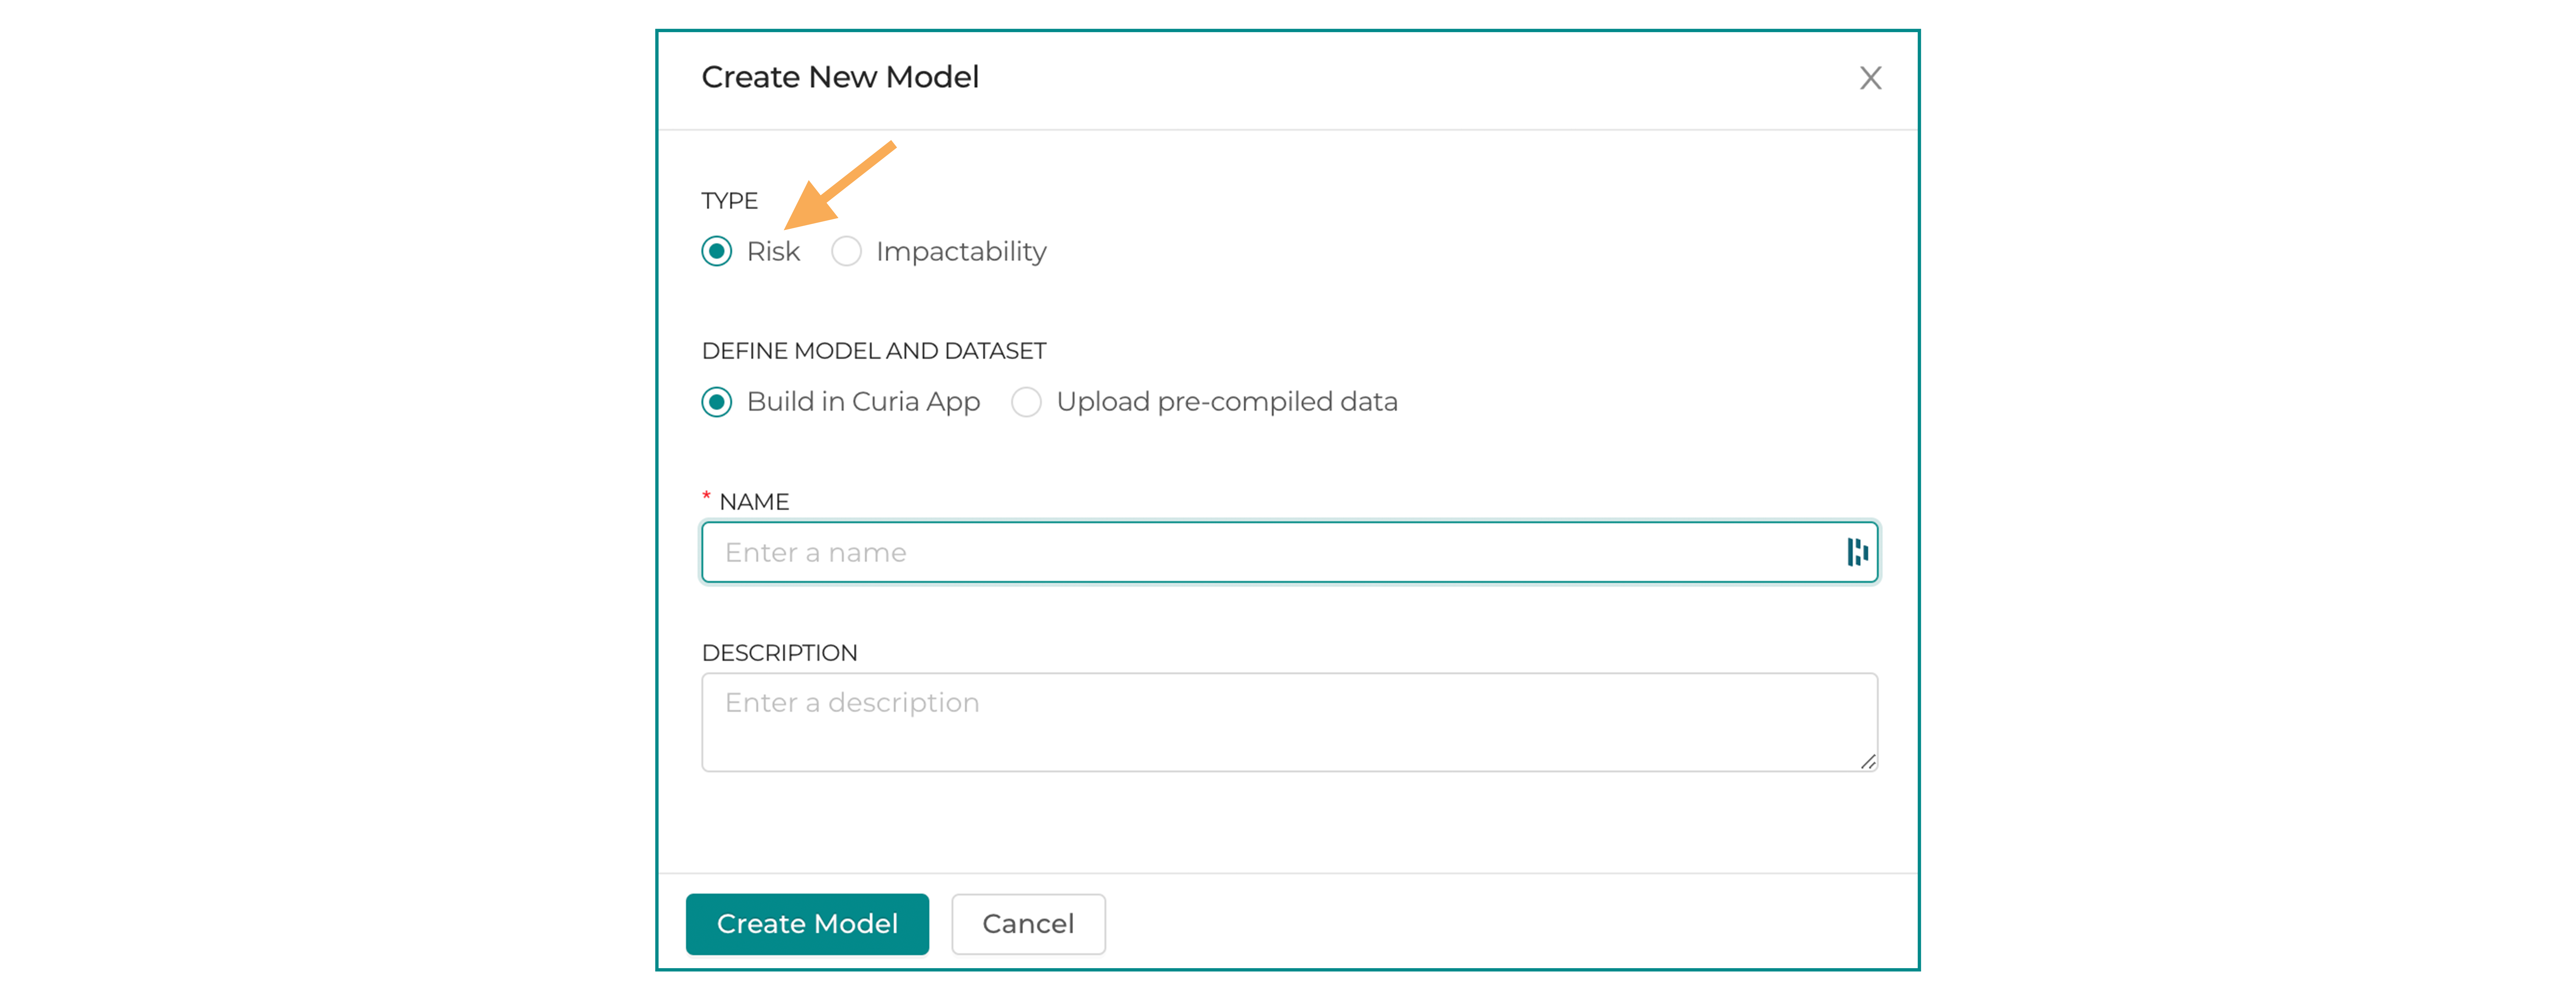
- The following box will pop-up:
- Type: Select "Risk"
- Define Model and Dataset
– Build in Curia App: Select if you want to define an outcome, intervention, cohort, and time period in the app (from which Curia will generate the model population and features)
– Upload pre-compiled data: If you have a completely custom training dataset (including features) that you wish to use
- Enter a name for your model
- (Optional) Write a description of your model
- Click the "Create Model" button, which will open a new page

Building in the Curia App
Outcome and Intervention
You will first be prompted to select an Outcome and Intervention
Outcome
-
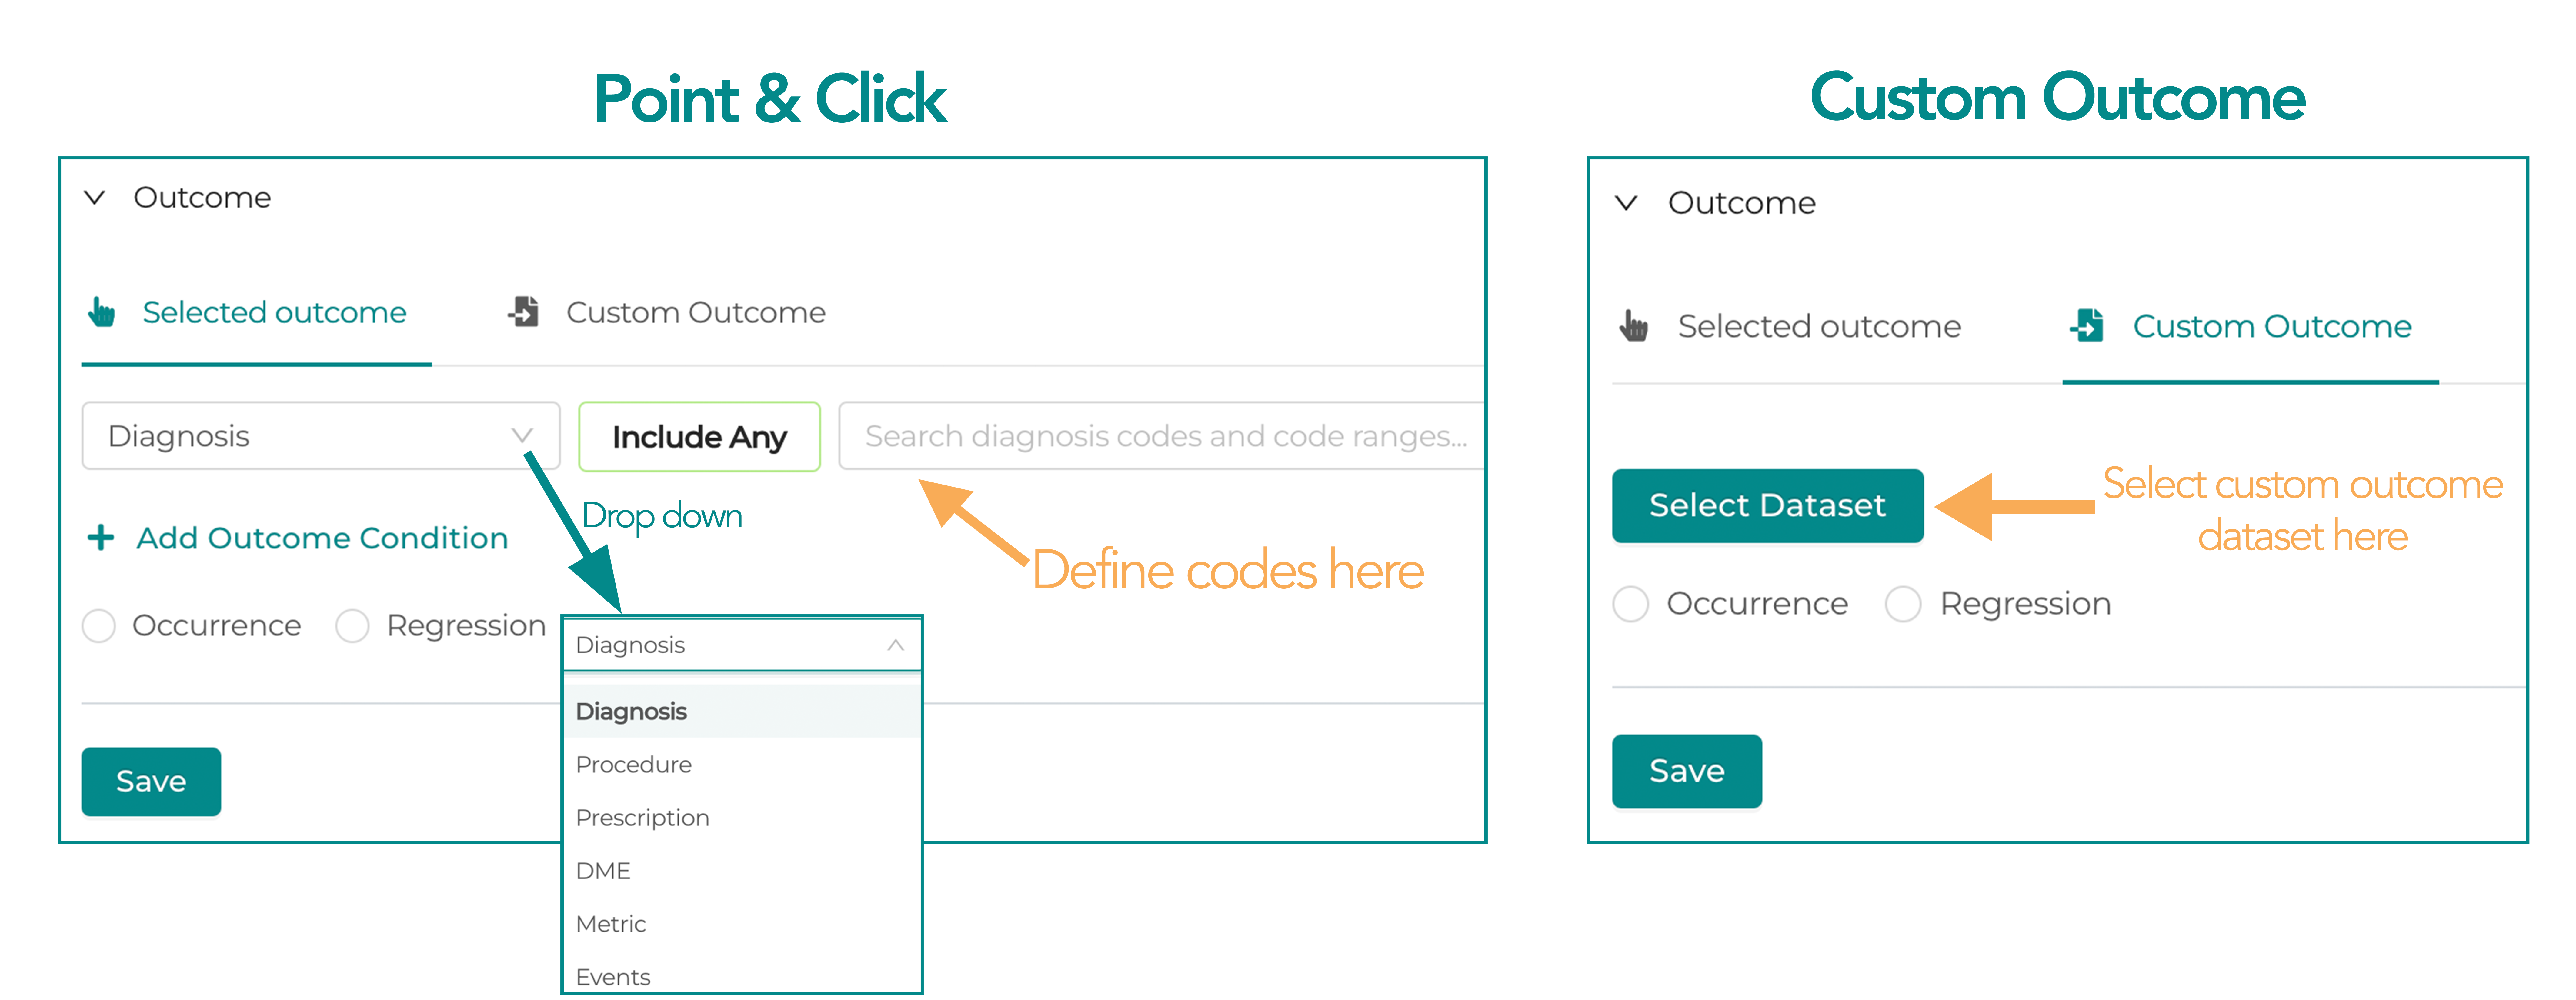
Select Outcome
– The Point & Click workflow allows you to define diagnosis, procedure, .... outcomes by selecting specific codes
– To model a custom outcome, select “Custom Outcome” and choose the outcome dataset you wish to use. -
Select Outcome Type:
– To predict the likelihood a given binary event occurs, select Occurrence
– To predict a continuous outcome, select Regression
-- After selecting Regression, you must choose an aggregation type.
-- Note that all aggregation types other than "count" will use event cost as the value to aggregate

Generate Cohorts
-
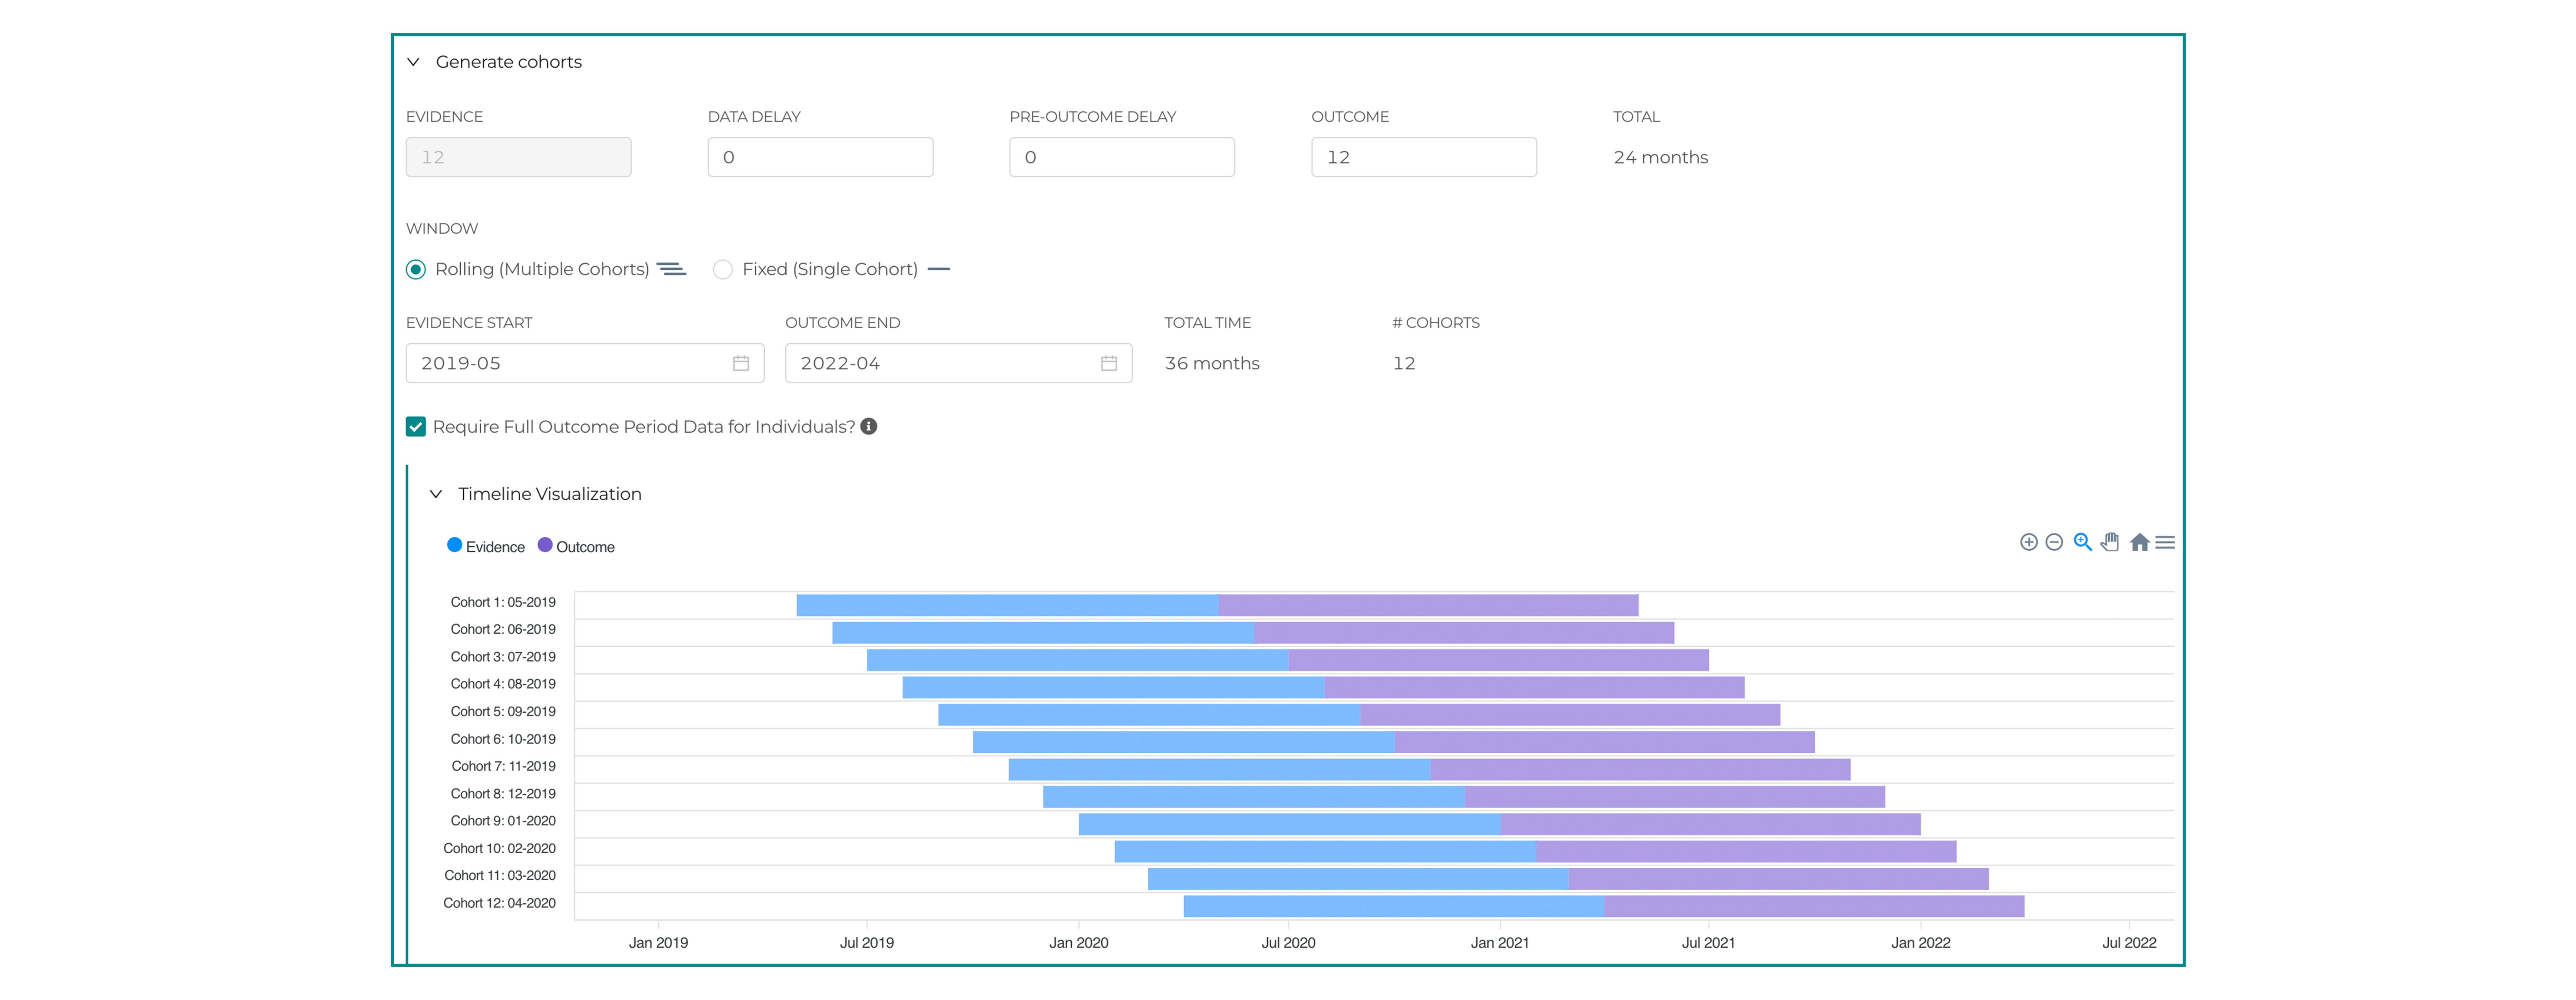
Set Evidence: The period of time that the covariates (features) for training are built on. This is always 12 months.
-
Set Delays:
- For a risk model, data delay + pre-outcome delay are added together to produce a total delay indicating the gap between the end of the evidence period and the beginning of an outcome measurement.
- Data Delay is used to indicate any delays related to data availability; e.g. a 90 day waiting period for claims to be processed would result in a 3 month data delay.
- Pre-outcome delay: The period of time to wait before measuring an outcome. E.g. if a known treatment such as a medication takes 1 month to produce any results, the pre-outcome delay should be 1 month.
- Outcome: The period of time that information is aggregated over to generate the modeling outcomes
Window
– Rolling (Multiple Cohorts): Select if you wish to create more data from a rolling window of several different incremental time periods. Then select the date when the evidence period starts and the date you want your outcome period to end across your windows.
– Fixed (Single Cohort): If you’re certain about your exact start and end dates for the evidence and outcome periods.
Require full outcome period data for individuals
– It is often the case that some individuals will die before the end of the outcome period (or switch to a new healthcare organization), meaning that if we are modeling on the occurrence of a specific code, this individual could have had this code, but we ran out of information on them since they aren’t in our dataset anymore.
– Checking this option counteracts the above by ensuring only individuals with data after the outcome period ends are included

Population
– New Code Filter: Add a filter that either only includes or excludes patients with specific code data in our modeling analysis

– New Demographic Filter: add a filter that either only includes or excludes patients that share some specific demographic information in our modeling analysis

– Select Dataset: This option allows you to define the cohort using a dataset. To do this, the cohort dataset must already have been uploaded to the platform. For information on this, see the Datasets Guide
-
Once you have configured all of these elements, click "Preview Model Data" to run queries that generate the relevant dataset and output summary statistics
-
Hit "Train Model"
- View status on progress bar
- Any errors will show up
- See Interpreting Risk Model Results
Updated almost 2 years ago
